I'm really happy (* v *)!!!! So I want to share other sewing tutorial with you!!!!
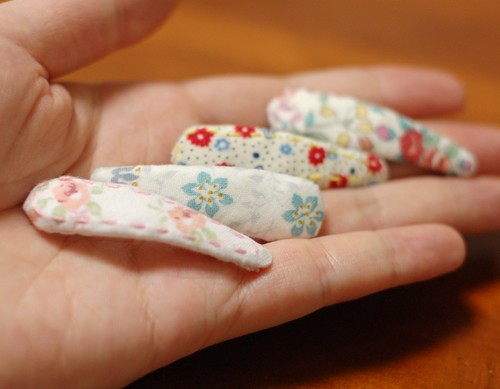
These days, I made some snap clips for my little niece.
So I want to tell you how I made the one of fabric covered.
I used 4 cm long snap clip. It is with a base to put a charm on it(But I don't need it for this.)
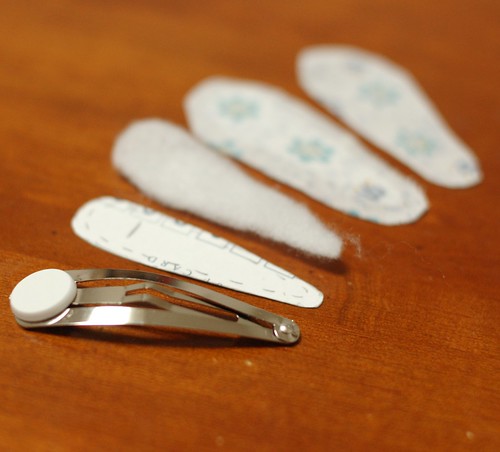
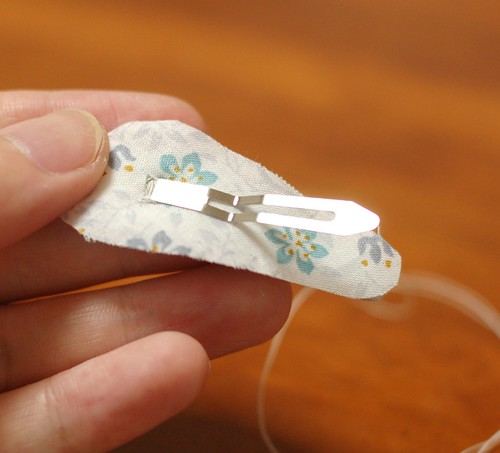
At first, I made a pattern from the clip. Put the clip on paper, and lined it.
Then, turn the clip out and check the red line of the picture. From here, the clip open.
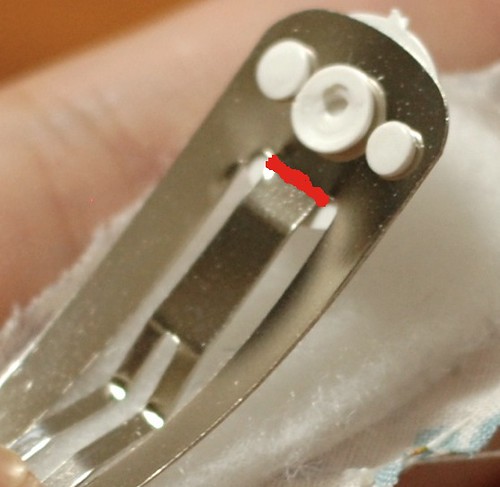
Write the red line on the pattern.
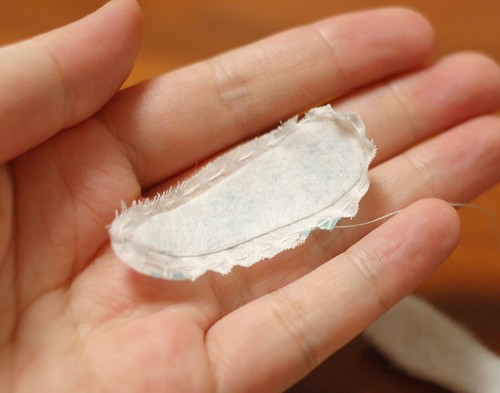
Then cut one piece of bating as the line of pattern.
And cut two pieces of fabric with 3-5 mm allowance to the pattern. For the fabric, it's better to put the pattern in bias because to fold the clip good.
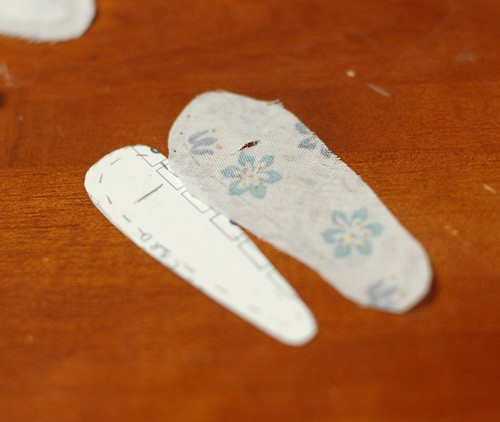
And for the under side fabric, cut the red line.
This time, I put adhesive interlining(cut as the pattern) on the upper fabric. It's because my batting was too thin.
Then, sew the allowance of the upper fabric with running stitch. After you should pull the thread, so please use the strong and enough length thread.
Don't cut the thread!
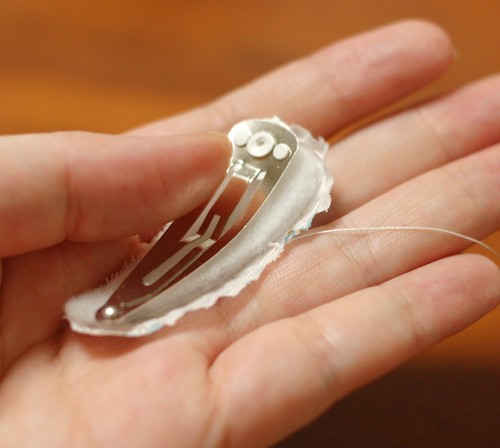
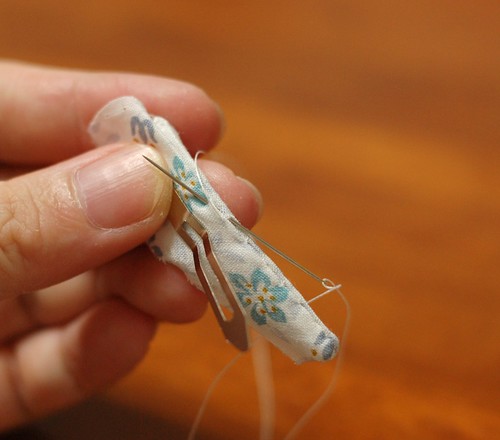
Put the batting and the snap clip on it and pull the thread putting the snap in the fabric.
Sew the allowance enfolding the clip.
Please be careful open the clip and not to fold the shorter flick(?<- Is this word correct???).
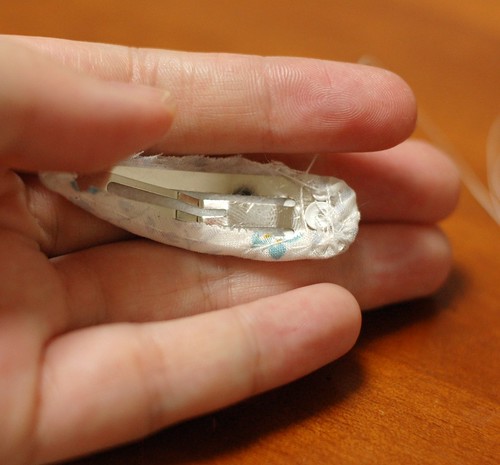
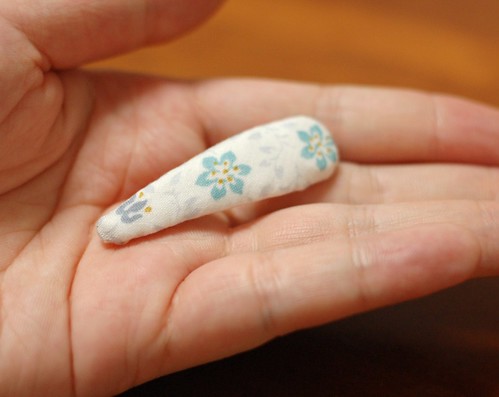
When I finished, it comes like this picture.

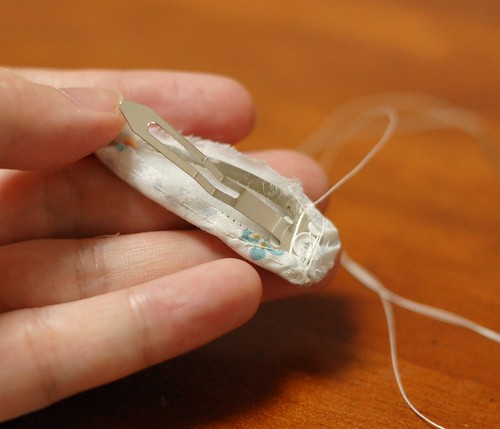
Then, put the fabric with the cut line on the other side to cover the stitching.
Sew the edge folding the allowance with blind stitch.
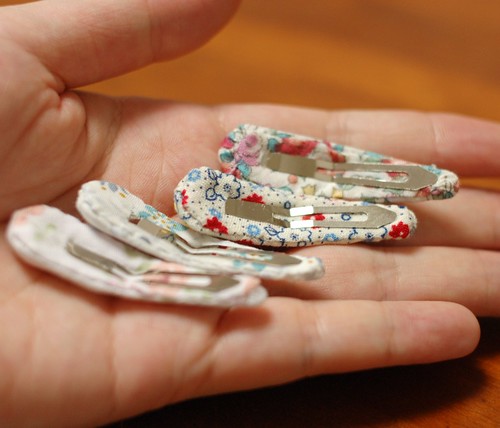
Finished!

It's easy to make it. Please try it!!!!
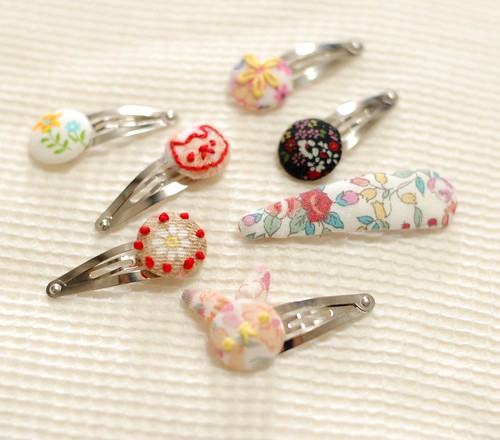
I also made some clips with covered buttons. They are easier than this tutorial.
Enjoy sewing small things!


42 comments:
Mai you are so clever! Your niece is very lucky to have such a generous and talented aunty
These are all really nice. I like the clip with the little embroidered button. So cute!
These are so cute. Thanks for the tutorial!
Hi, I too make fabric covered snap clip but a little bit different than your. Mine just sew the cover first then put the clip inside it. Little bit easy but I will try your tutorial because it look so easy! Sure I will try! Thanks for the tutorial!
Thank you for posting this tutorial!! I've been wanting to make some of these for my daughter but haven't known exactly how to do it!!
I posted a link to your tutorial on Craft Gossip Sewing:
http://sewing.craftgossip.com/tutorial-fabric-covered-hair-clip/2009/07/18/
--Anne
Kawaii! Did you make the buttons too?
So cute! Thanks for this. :)
Everything you do is so creative. Really love looking at your blog.
Mia, these are so sweet. Your niece sure is a lucky girl. What an Aunty she has. Thank you for showing us how you put them together.
Thanks so much for the great tutorial! I am going to give this a shot (even though my hand sewing skills aren't the greatest!). One question though, where do you get the barrette with the charm base?
Your sewing is so tidy and neat. It is just so beautiful to look at!
Hello,
I made also these buttons. They are from prastic buttons for making covered buttons. I only covered the button with fabric. Next time, I'll show you.
I got the clip and the prastic button from Japanese online shop. I regret that I got only small amount of them...
Thank you very much for your comments!
thanks for the lovely idea, I made one in my favourite fabric straight away! xx
I love the little bunny clip ^^
So cute! I would love to give these a go. Also a great idea for using fabric covered buttons, I always want to use them for something special.
Really cute! I will try this. Thankyou Mai.
Looks cute.. I'll try to make it, hope it can look like yours.. thanks!!
Annabel-México
You are so smart! What a wonderful project. I have lots of those little clips that have chipped paint. Great way to refurbish!
Aww, these are super cute! Thanks so much for sharing all of your adorable ideas with us, I'll be linking.
so pretty - please put some in your etsy shop
if i have a daughter *cross fingers* ^_^ i'll make these for her.
they're beautiful! your so clever!! well done! thank you very much for sharing!
wow, thanks so much for sharing, i will try to make one for my 5 y.o :)
This is so sweet! I'll have to give it a try~hope mine come out as nice as yours! :)
Such adorable clips, thanks for the great tute, I must make some for my little girls soon!
These clips are beautiful! I have been looking for a how-to on covered hairclips. Thank you so much!
ohhh thank you! I must give them a try! thanks for sharing the tutorial, so kind of you!
Corrie:)
What a great tutorial's. I wanna add u as my friend.Love all the craft and handsewn u made. pls visit me sometimes.
beautifull & thanks !
hi...very nice....will make a pair for sister's daughter....thanks for the tutorial........
These are so cute! And easy enough I think i could make some for my little girl. thanks for a cute tutorial. YAY!
Anne
hi mairuru.. :) thanks for this adorable how to tutorial :) i will definitely try this.. i've been wanting to make this since i saw one in a store, but then i forgot about it.. now i've seen an even better one, i'll definitely going to try this.. :) hopefuly next week.. :D thanks again mai.ruru :)
ps: i love japanese language.. my brother've studied it for a couple of years.. wish i could do that too :) arigato gozaimasu mai-chan... :D :D
hi.. I just found your blog. These are great.. I think I'll make some for my little cousins.. thanks for the tutorial. :)
hello Mai-san
may i know what's the name of the white fabric there?the one in between the clip, is it felt ? thank you :)
Hello Feri,
It's batting, not felt.
Great tutorial! I've linked this to my blog. Thanks for sharing. I really love your blog,with all your cute tutorials and beautiful photos!
this is just wonderful and very simple! you are so cool to think about it!!
I love your stuff!
They are lovely! I have added a link to www.lovelifelovecraft.co.uk
The threat to use liability on intermediaries is a chilling tactic divergent from any of the controls being used in our institution.
If we cannot find enough resolve to prevail, then let someone else propose the compromise whereupon they work hard to steer it their way.
The new Google Penguin update has made a lot of webmaster rethink their SEO strategies. It is critical that your website is ranked well with the major search engines like Google and Bing.
Post a Comment